An Affordable Nontoxic Candle Option
You guyssss! It’s almost officially Fall! I’ve already been throwing up some decorations here and there and pretending that I’m not sweating sometimes in my leggings and sweatshirts, but it’s all good! And is it really Fall without that beautiful glow of a candle? I think not. So I want to tell you about an affordable nontoxic candle option that is beautiful and safe for your home!

This post contains affiliate links, which means I make a small commission at no extra cost to you. Get my full disclosure here.
What Made Us Switch
It’s been at least 8 years ago since our family made the switch from regular candles to beeswax. It was a hard change! I always had a candle burning in our home and I loved the wax melts too! My favorites were the ones that smelled like warm maple syrup, it literally didn’t get any better than that! Somewhere on my journey to having a VBAC (if you haven’t read my VBAC story you can check it out here), I discovered all this information about toxic things in our lives. One of those toxic things being candles! I’ll be honest, I was devastated! Not only did I find out this information through seeking out a VBAC, but my dad had also survived his battle with Non-Hodgkin’s Lymphoma. It was a roller coaster of a ride, needless to say, that added to my desire to switch to more natural products in our home.
Did You Know?
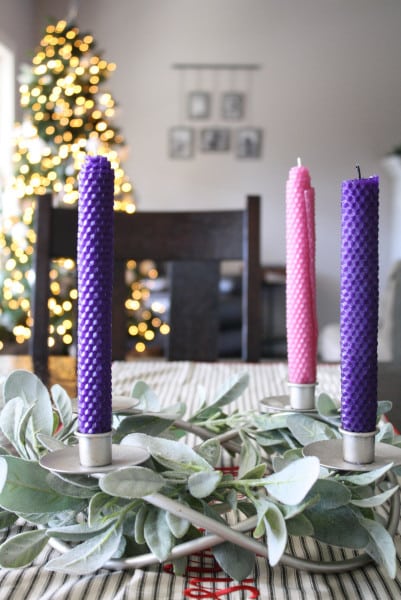
Did you know I used to own a small shop making beeswax candles and other beeswax products? It all began because I wanted these nontoxic items for our family and then it turned into me wanting to share them with others! It was a ton of fun and also a ton of time. As our family grew, I decided to let it go and focus on my family. But I still enjoy making these candles for our own personal use! These also make great gifts during Christmas! And for Christmas every year the kids and I make our own Advent candles! Such an easy and simple way to have a little tradition that we all enjoy!
Beeswax: An Affordable Nontoxic Candle Option
So there are lots of varieties of candles: paraffin, coconut, soy, palm, beeswax, and even gel. Like anything else you have the worst option, better option, and best option.
Paraffin being the worst because it releases benzene and toluene into the air, both are known carcinogens. If that doesn’t bother you, it’s the same toxins found in diesel fuel. It’s just filling up your home! That’s not all! Scented candles contain fragrance. Did you know anytime the word fragrance is listed in the ingredient list it covers more than 100 toxic ingredients? These fragrances are linked to allergens, hormone disruptors, neurotoxins, and again carcinogens. (source)
Coconut, soy, and palm are better options. However, a lot of times even these candles will contain a mix of waxes. It may advertise as a soy candle, but it could be a blend of soy and paraffin. Typically this is done because some waxes are harder to pour than others to make a pretty candle.
The best option and an affordable nontoxic candle option is 100% pure beeswax. Beeswax candles do not contain any harmful chemicals or burn off compounds that are known carcinogens. Beeswax doesn’t need any added fragrance because it has a light honey scent all on its own. Sometimes candlemakers will blend beeswax with another wax, so it’s important to always ask if the candles are 100% pure beeswax.
The easiest way to enjoy this nontoxic candle option is to make them yourself, I promise it’s so easy your kids can do it!
Real quick before we jump into the DIY, I joined in a little Fall blog hop, so if you’re looking for more fun fall treats and DIYs you need to check these out!

Easy Pumpkin Dip with Cream Cheese
Easy & Delicious Apple Fritters
How to Make Pumpkin Bread from Fresh Pumpkin Naturally Sweetened
DIY Hand-Rolled Beeswax Candles
I’ve used a lot of different beeswax sheets, but I love Toadily Handmade! I have purchased from them several times and they never disappoint! Their customer service is amazing also. What’s even better is they offer kits! In a kit you’ll receive everything you need to make a few of your very own hand-rolled beeswax candles!
There are lots of options for colors as well. I usually buy the natural honey color, but decided to go with white this time for a change! (Choosing the natural option is the healthier option, because it doesn’t contain any dyes).
Step-by-Step Instructions
First up, you’ll need to grab this kit from Toadily Handmade! There’s enough wax sheets and wicking in the kit to make 10 taper candles.

Once you receive your kit, remove all your items from box. Take 1 beeswax sheet and gently fold in half, as my grade school teacher would say “hamburger style”. Anyone else grow up with hamburger/hotdog style, no just me?
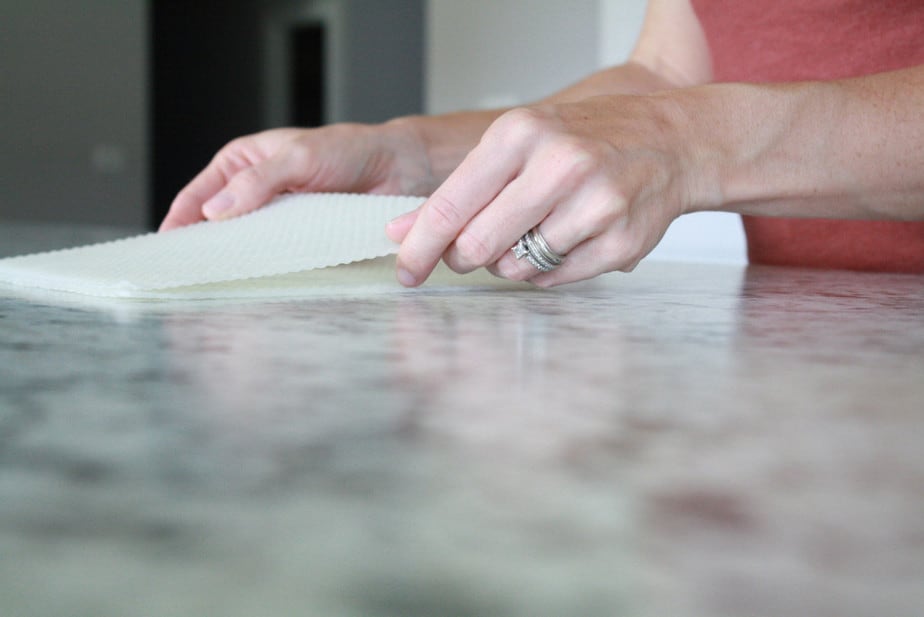
You will gently fold back and forth until you have 2 pieces. Then you will take your wicking at the bottom edge of your half beeswax sheet. One end of the wicking should line up at the edge of the beeswax sheet, while you leave enough wicking hanging off at the other end to be able to light the candle later.
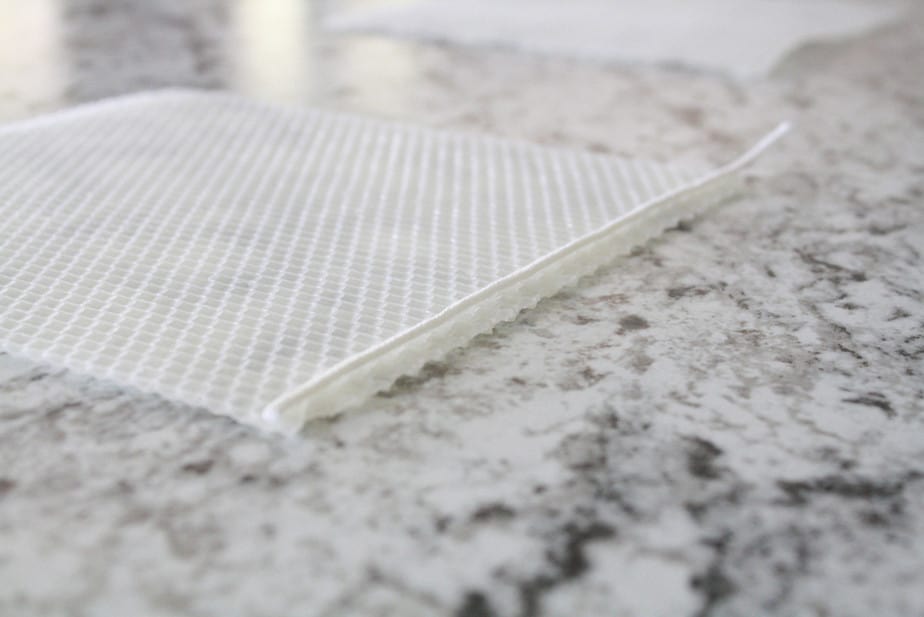
If your house is cold you may need to use the warmth of your hands to soften the beeswax so it will roll easier. You can also use a hairdryer for this. It’s warm enough here still that just using the heat from our hands is enough to begin gently rolling the sheet up around the wicking.

As you’re rolling make sure your wicking stays lined up at the bottom. Once it is completely rolled up, I like to press the edge down some with my fingers to make it stay and lay smoothly.

Repeat with your other half of beeswax.
DIY Handrolled Beeswax Candles

Easy DIY Handrolled Beeswax Candles for healthier living!
Materials
- Toadily Handmade Beeswax Candle Making Kit
Instructions
- First up, you'll need to grab this kit from Toadily Handmade! There's enough wax sheets and wicking in the kit to make 10 taper candles.
- Once you receive your kit, remove all your items from box. Take 1 beeswax sheet and gently fold in half lengthwise or as my grade school teacher would say "hamburger style". Anyone else grow up with hamburger/hotdog style, no just me?
- You will gently fold back and forth until you have 2 pieces. Then you will take your wicking and lay it lengthwise on the edge of your half beeswax sheet. One end of the wicking should line up at the edge of the beeswax sheet, while you leave enough wicking hanging off at the other end to be able to light the candle later.
- If your house is cold you may need to use the warmth of your hands to soften the beeswax so it will roll easier. You can also use a hairdryer for this. It's warm enough here still that just using the heat from our hands is enough to begin gently rolling the sheet up around the wicking.
- As you're rolling make sure you wicking stays lined up at the bottom. Once it is completely rolled up, I like to press the edge down some with my fingers to make it stay and lay smoothly.
- Repeat with your other half of beeswax.
More Fun
Now that you have your candles made you might be wondering what to put them in. I recently ordered these beautiful taper candle holders. They’re functional and only $8.99 for 2!

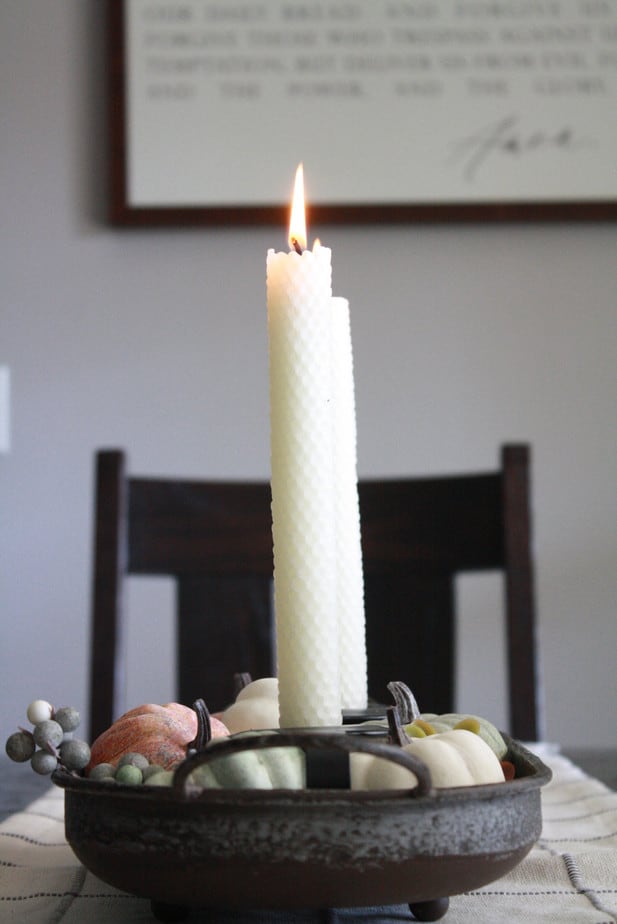
These candles make the perfect addition to any décor! I especially love them during the Fall and Winter! If you’re looking for some cute Fall décor, I grabbed this stuff that’s on my table (photo below) from Hobby Lobby! Their Fall line is 40% off right now! I can’t find the metal tray I have the pumpkin succulent mix in. It was the last one I found at my store. I just made sure I bought something wide enough to hold the 2 candle holders.
And If you’re interested in making your own advent candles this year too, here‘s the link for their advent candle making kit! I would go ahead and purchase it because these usually run out fast!
Be sure to tag me on social media! I wanna see your candles! Happy Fall, friends!


One Comment