Homemade Biscuits the Old-Fashioned Way
Good old-fashioned biscuits have been around for a long time. And they’ve become an essential in our home over the years. Not only are they the perfect side with a comfort dish like roast, potatoes, and carrots, but my husband has fond memories of his grandma’s biscuits growing up. Grandma’s biscuits are always the best biscuit recipe in his eyes, and I wanted to honor that. So after playing around with some different ingredients and ratios, I’ve come up with the perfect old-fashioned homemade biscuits with lard recipe and they’ve been approved as tasting like Grandma’s!
I know from-scratch recipes can be intimidating, but don’t worry, if I can make these biscuits, you can too! And trust me, it’s worth the little bit of extra effort to have these homemade biscuits rather than canned biscuits from the store. It’s a healthier option and the delightful flavor will keep you from ever buying store-bought biscuits again! Just a few simple ingredients mixed up with some love, you’ll have the best biscuits and they are sure to become a staple in your house from now on too!
PIN FOR LATER

This post contains affiliate links, which means I make a small commission at no extra cost to you. Get my full disclosure here.
Why You’ll Love These Homemade Biscuits
- This will soon become your go-to recipe for biscuits and here’s why!
- You’ll find this easy homemade biscuit recipe has few ingredients! Making this a quick recipe to whip up.
- Unlike most homemade biscuit recipes, this recipe doesn’t add any sugar!
- It’s common for vegetable shortening to be used in biscuit recipes, but lard is a healthier option, gives a flavorful taste, and works as well as vegetable shortening! So serve up these biscuits with nutritious ingredients that you can feel good about giving your family!
- Certainly, these homemade biscuits will remind you of your grandma’s perfect biscuits!

Kitchen Tools
- Cast Iron Skillet – You don’t have to use a cast iron skillet, but I do think it gives these biscuits that old-fashioned feel and taste. You can also use a stone baking dish or a greased stainless steel baking sheet.
- Pastry Cutter – This makes it easier to cut the lard/butter in.
- Biscuit Cutter – These are easier to cut biscuits than using a cup because the biscuit won’t suction to it like a cup. A round cutter gives clean edges and helps them rise evenly.

Ingredients for Homemade Biscuits
- All Purpose Flour – This recipe uses all-purpose flour rather than self-rising flour. Generally, self-rising flour contains aluminum from the baking powder.
- Baking Powder – I always use baking powder without aluminum. Most of the time it can be found at your local grocery store. This is what gives rise to the biscuits.
- Salt – This adds flavor to your biscuits.
- Lard or Butter – Using lard gives these biscuits that real old-fashioned taste, but butter works well too. Be sure the lard or butter is cold and not at room temperature. Cut into small cubes for the best texture.
- Milk – This has been used for years in making those good old-fashioned homemade biscuits!
- Butter (optional) – Lastly, you can add additional butter on top of these biscuits to give them a nice golden color.
How to Make Homemade Biscuits the Old-Fashioned Way
- Preheat – Preheat oven to 425° F.
- Prepare – Prepare working space with a floured surface, biscuit cutter, or glass cup. And prep a cast iron skillet by greasing it with butter.
- Mix Dry Ingredients – To a large mixing bowl, add flour, baking powder, and salt. Stir to combine.
- Add Lard/Butter – Next, cut into the large bowl the cold lard or butter into the flour mixture with a pastry cutter or fork. Blend until it resembles coarse crumbs. A food processor also works well to cut the butter into the flour mixture.
- Add Milk – Add regular milk and mix until combined. If your dough forms and is slightly sticky, that’s okay!
- Flatten Dough – On a floured surface, turn the dough out. Flatten dough out with hands to about 1/2″ thick. Avoid overworking, especially with sticky dough—this keeps your biscuits soft and tender.
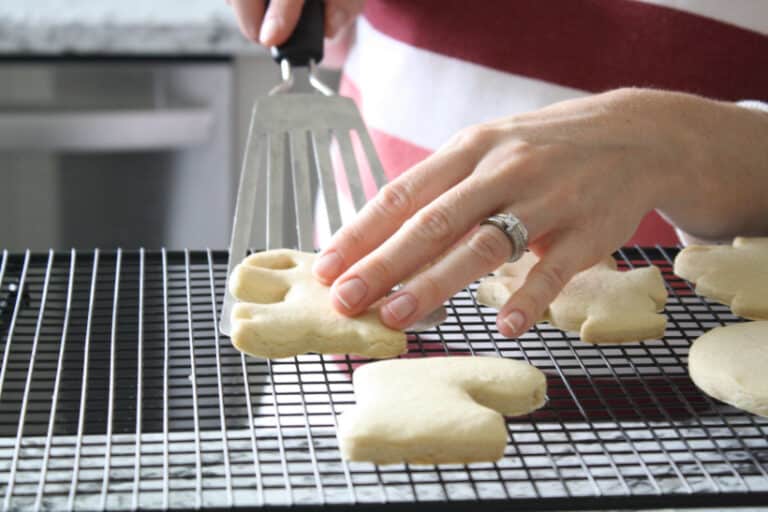
- Cut Biscuits – Use a round cutter or a glass cup to cut biscuits. Do not spin the cutter/cup.
- Transfer Biscuits – Place biscuits in a cast-iron skillet or baking pan.
- Optional – Top with optional butter for browning.
- Bake – Bake for 15-20 minutes or until golden brown.
- Serve – Lastly, serve with your favorite toppings, serve with supper, or even make your own bacon, egg, and cheese sandwiches.

Biscuit Toppings
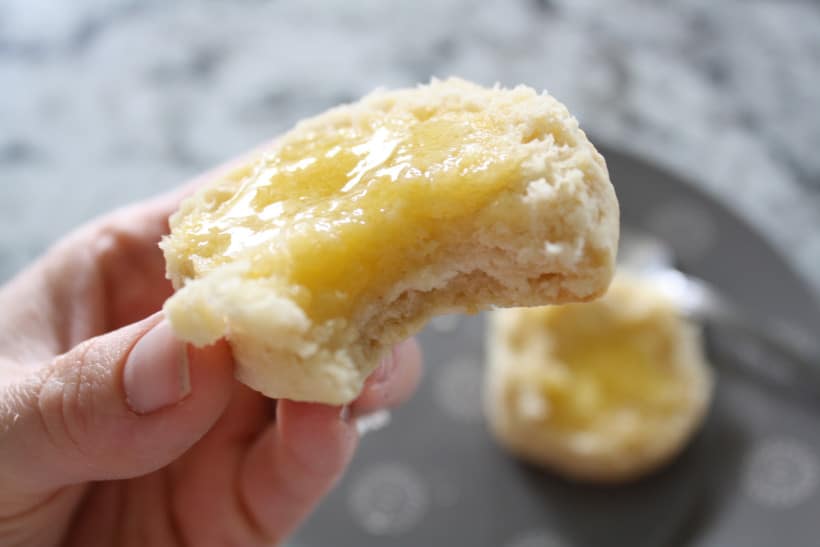
- Butter – Butter on top of a freshly made biscuit is one of the best breakfast or snack options.
- Syrup – I know not everyone does this, but my mom always ate her biscuits with butter and syrup like a pancake. Don’t knock it until you try it!
- Honey – I love adding this on top of a fresh buttered biscuit, it gives it just a hint of sweetness.
- Jelly/Jam – There are tons of options for yummy jams and jellies to top your biscuits. Try out this Easy Homemade Berry Jam without Pectin.
- Eggs – Toss some scrambled eggs and cheese on your homemade biscuit for a quick, filling breakfast option.
- Biscuits and Gravy – Another old-fashioned breakfast idea that is loved by all! These homemade biscuits are especially good with country gravy poured over them.
- Bacon/Sausage – Additionally, you can make your bacon or sausage, egg, and cheese at home!
Tips for Perfect Homemade Biscuits
- Using a cast iron skillet yields the best results.
- Be sure to use cold lard/butter.
- Cut your lard or butter into small cubes before mixing it in.
- Do not use a rolling pin for the dough; just flatten the dough out with your hands.
- Do not spin the cutter or cup when cutting the biscuits. This keeps the biscuits from being fluffy.
- Topping with the butter makes for beautiful, golden brown coloring.
- Using lard rather than butter will give them an old-fashioned taste to these biscuits! It’s what grandma used!
- If you have any leftover biscuits, store them for breakfast sandwiches or serve them alongside Sunday dinners later in the week.

How to Store
Store in an airtight container on the counter for up to 5 days. For longer storage, consider freezing your biscuits once they’re baked and cooled.
How to Reheat
Microwave – Transfer biscuit(s) to a microwave safe plate, use a damp paper towel on top and warm in 15 second intervals until desired temperature.
Oven – Preheat oven to 350°F and warm them for about 10 minutes until desired temperature.
FAQS
Lard is typically made from pork fat that has been separated from the meat. Once it is rendered and chilled, it will solidify and have the consistency of shortening.
The best option would be to find a local farm that sells rendered lard. But if you can’t find a local farm, most grocery stores carry lard. Be sure to read the ingredients, because it should only contain pork fat and maybe some seasonings. I usually buy lard from Thrive Market. Join Thrive Market now and get 40% off your first order.
You can add a little bit more flour, a tablespoon at a time, until it’s manageable but still soft. A sticky dough helps create fluffy layers.
Add in a little more milk, a tablespoon at a time, until the dough forms correctly.
Yes. Just follow the recipe, but instead of baking, place the cut-out biscuits on a baking sheet and chill until firm or you have a frozen biscuit. Then transfer to an airtight container or gallon freezer bag and use within 3 months.
Homemade Biscuits the Old-Fashioned Way

These homemade biscuits are just like grandma's! Perfect for breakfast or to serve as a side at supper.
Ingredients
- 2 Cups of All Purpose Flour
- 3 tsp Baking Powder
- ½ tsp Salt
- 2 TBSP (Heaping) Lard or Butter
- 1 Cup of Milk
- 1 TBSP Butter (optional for browning tops)
Instructions
- Preheat oven to 425°F.
- Prepare working space with floured surface, biscuit cutter or glass cup. And prep cast iron skillet by greasing with a little butter.
- To a large mixing bowl add flour, baking powder, and salt. Stir to combine.
- Next, cut in lard or butter into flour mixture with a pastry cutter or fork.
- Add milk and mix until combined.
- On floured surface, turn dough out. Flatten dough out with hands to about 1/2" thick.
- Use biscuit cutter or glass cup to cut biscuits. Do not spin cutter or cup.
- Place biscuits in cast iron skillet.
- Top with optional butter.
- Bake for 15-20 minutes or until golden brown.
Notes
More on the Blog
Now that you’ve made your own biscuits, consider yourself a southern cook! Don’t forget to serve them with Instant Pot Smashed Potatoes and your favorite meat dish! Whether it’s for breakfast with eggs or as a side for your favorite Sunday dinners, this will be the best biscuit recipe to pass down to your kids. And don’t forget about dessert with this Classic Sugar Cookie (no chill) recipe.